

Windows 8.1 PC Refresh and PC Reset Broken after Upgrade
While PC Reset isn’t a backup option, per se, PC Refresh did grab my attention as a solution suitable for those who are less technically savvy. More importantly, as time passes more and more programs will be developed for WinRT and the Metro interface making the PC Refresh option an exponentially more valuable feature. However, it appears my hopes have been dashed – at least many users are reporting so. If you are running Windows 8.1 and you upgraded from Windows 8 using the Windows Store you may be in for a very unpleasant surprise if you need to use either PC Reset or PC Refresh. Many users are reporting that when they attempt to perform a PC Reset or PC Refresh that the process stalls almost immediately and asks the user to insert the Installation media. Unfortunately for those affected they have no Windows 8.1 media as it was downloaded through the Windows Store and their original Windows 8 media or recovery partitions are not accepted as valid. I haven’t been able to find a definitive reason why this occurs, but an educated guess is that Windows does not recreate the images used for these two features during the upgrade process.
Windows 8.1 PC Refresh Workaround
While I haven’t yet discovered a workaround for PC Reset I do have a workaround for PC Refresh and it is something that everyone running Windows 8 or Windows 8.1 should find useful! What would that workaround be? Simple. Create a custom PC Refresh image. Think of a custom refresh image as an updated version of the default image which contains all the information regarding programs, apps, personal files, settings, and Windows itself at the time the image is created, which should be useful to Windows 8 users as well.
1. Move your mouse to the lower left corner of the screen and right click to open the Power Menu.
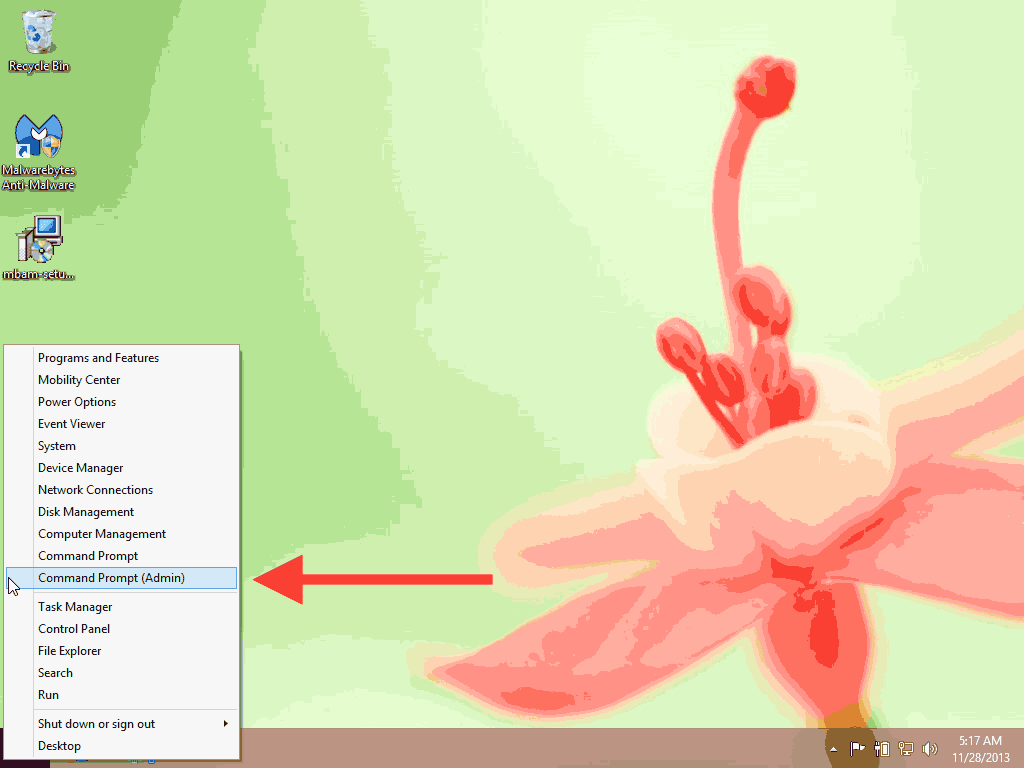
2. Move your mouse up to Command Prompt (Admin) and left click it to open a command prompt with Administrator privileges.
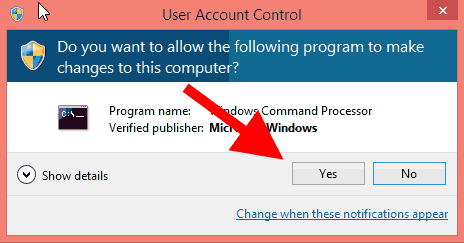
3. Click Yes on the User Account Control warning dialog box to approve the use of the Command Prompt with Administrator privileges.
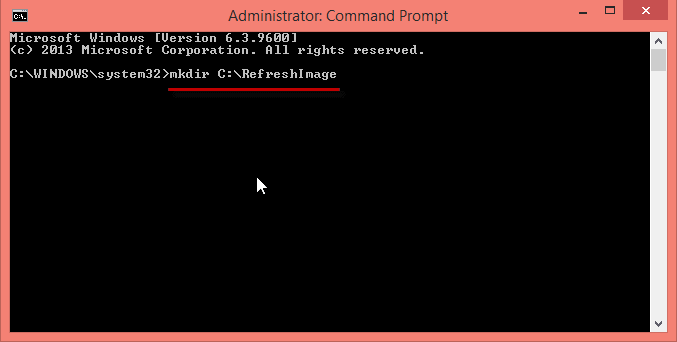
4. When the Command Prompt window opens you will see a flashing cursor afterC:\\WINDOWS\\system32>. At the flashing cursor you want to type mkdir C:\\RefreshImage (M K D I R {space} C {colon} {backslash} R E F R E S H I M A G E) followed by pressing the Enter key. This will make a new directory named RefreshImage at the root of your C: drive. (Note: The above location C:\\RefreshImage is an example – you can create the folder and image on any storage device by changing the location of the command, but remember the device must be available for the PC Refresh to be successful.)
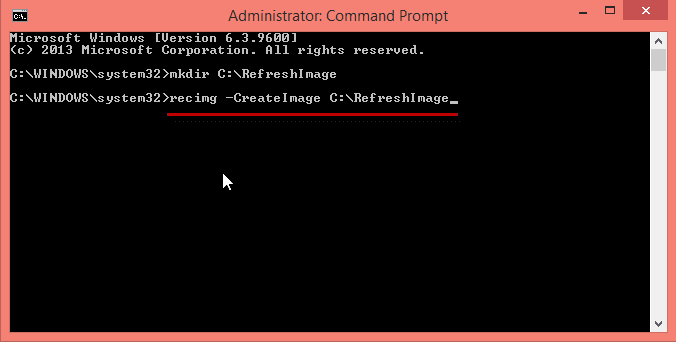
5. Type recimg -CreateImage C:\\RefreshImage (R E C I M G {space} {dash} C R E A T E I M A G E {space} C {colon} {backslash} R E F R E S H I M A G E) at the flashing cursor followed by the Enterkey. This will begin the process of creating a new Refresh Image in the new directory we created above.
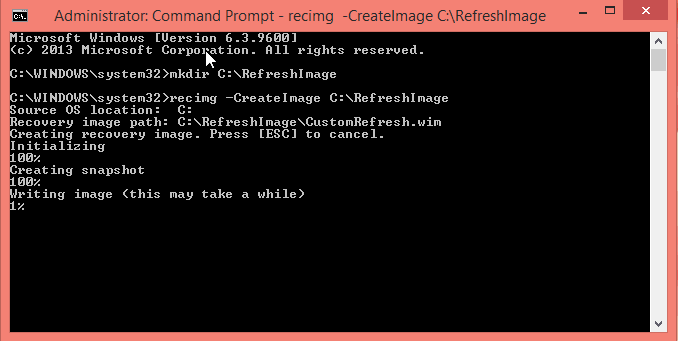
6. Windows will create a snapshot, which won’t take very long at all, before writing the file to the C:\\RefreshImage directory. The actual writing of the file to the hard drive will take a while, so be patient.
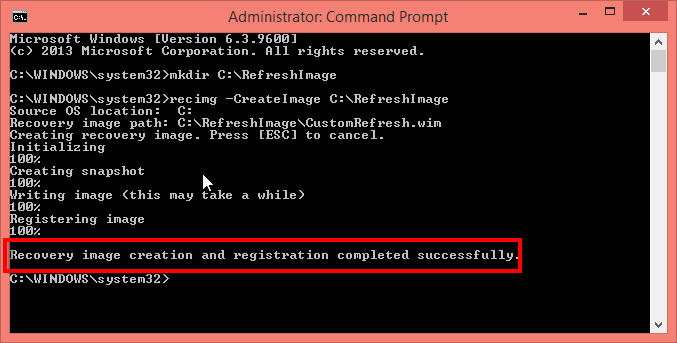
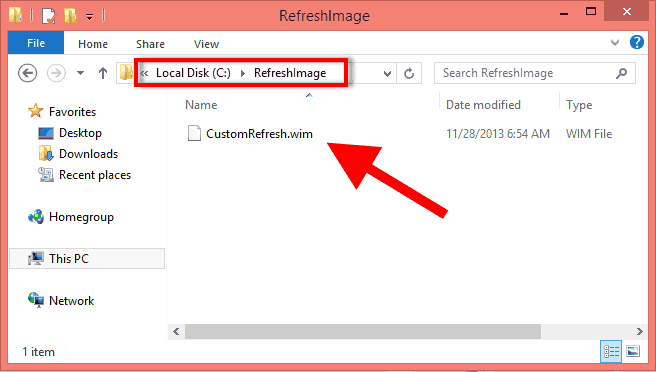
7. After the image is written to the hard drive you will receive confirmation and the new image will become the default image for the PC Refresh function. If you open a File Explorer window you’ll find your new image in the RefreshImage folder on your C:\\ drive.

One thought on “Windows 8.1 Update Refresh Problem”